
Printing Student Reports for Conferences
Completion requirements
Printing Individual Student Reports
Generating the Reports for your class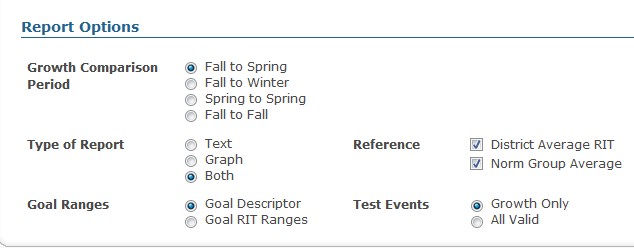
- Log into MAP reports site
- Click on the View Reports and Instructional Resources link in the left margin to expand the menu
- Select MAP Reports from the expanded menu
- From the MAP Reports section of the page, select Student Progress Report
- Select the testing term, and use the drop-down boxes to filter for the appropriate class
- When the class list appears, use the Select All button to choose all members of your class
- Select the desired Report Options at the bottom of the page (see Report Options image to see what common defaults are for BPS reporting) --->
- Clink Create Report button
- A "Generating Report please stand by" message will display, and if the page does not open immediately you will see a message that reads "We're working to put together your report...." This indicates that your report will take some time to generate and that you can find it in the report queue when it is complete*

* Larger reports will be sent to the Report Queue and will be available for viewing and printing after they have generated. Reports will stay in the report queue for 14 days, at which time they are automatically deleted from the system.
Accessing reports from the Print Queue (Printing Reports)
- Click on the link for Report Queue (under View Reports and Instructional Resources)
- You should see a report titled Student Progress Report in the Report Queue. Click on the Download link on the right.
- You will be prompted to either Open or Save File. Open the file. (see image 3 )
- When the window opens to display the file, click Extract All Files (see image 4), then click Extract on the next window.
- The files will Extract to a new folder. Click to drill down into the folder and see the student reports.
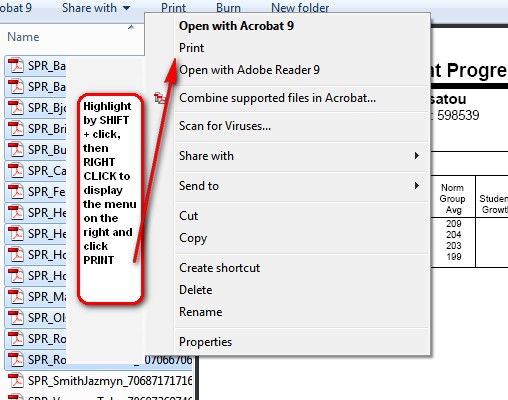
- Student reports can be printed individually, or you can print in batches of 15 by holding the SHIFT key and highlighting the reports to print. Once 15 or less reports are highlighted, right-click and select PRINT (see image 5). The selected reports will be sent to the Default Printer for your computer.
- Repeat step 6 for the remaining reports. Only 15 reports at a time can be printed with this method.
image 3
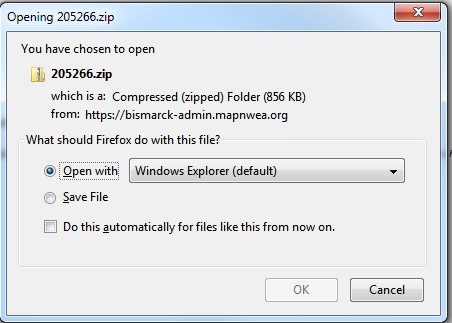
image 4
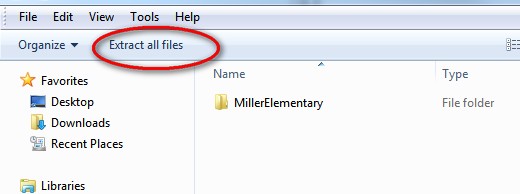
image 5
Last modified: Monday, January 23, 2012, 3:14 PM